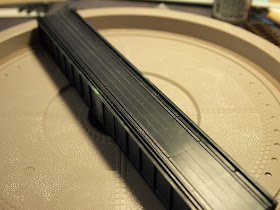
While that turntable worked and was a good first experience, it wasn't quite the "look" I was going for. A turntable is one of the main track features for Tincup and I was rather set on a pit style turntable. The deal is though that there aren't many of those for HOn3.
I found a conversion kit offered by Firebox Models that converts a Walthers N-scale 130' turntable to HOn3. The conversion kit is only $37, which I thought was fair, but the Walthers turntable is DC/DCC and is currently available for pre-order for $279. That's a bit more than I was planning so I turned to the faithful sidekick of model railroaders everywhere: kitbashing.
Unlike the 130' DCC turntable, the Walthers N-scale 120', manual, non-DCC turntable only costs $26 and can be had locally. As I had today off for the New Year's I made a trip to my LHS and picked one up.
Here's what comes in the box...
Here are the instructions to give you an idea about what parts this kit comes with...
Right off the bat there were a few things I knew wouldn't work. First, the pit depth is about half of what I feel would look good for HOn3. Second, the pit itself has a really odd pattern cast into it, including what look like the remnants of casting marks.
I'll deal with the pit later. Today's project: Kitbash a new bridge.
While I was the hobby shop, I picked up Micro Engineering's HO 50' Girder Plate bridge kit. This simple kit sells for only $4.95 and was perfect for what I was looking for.
You can see the difference in the height right off. I'm confident this will make a huge difference in the overall appearance of the scene.
The girder plates are in 50' lengths but the N-scale turntable represents a 65' turntable (which on a side note, the longest turntable the D&RGW had was 65' so this length should look right at home with narrow gauge engines). I got to work by determining how the girder plates were going to be cut and joined back together as one. I chose to cut in the middle of two sections to give the illusion that the middle-most section of girders is wider than the rest of the separations.
I made a mark with a scribe where I planned to cut, then used rail nippers like scissors to cut the plates. I left a lot of extra and filed down the cut areas to a flat 90º angle.
Once cut I then glued both sections together.
And added some styrene sheet for reinforcement on the opposite side.
Both sides were built to be the same length as the original bridge deck.
Which I then used and glued my new sides to.
The kit had come with inner reinforcements which I added.
They didn't really do much structurally, so I went ahead and cut some of my own and added those.
I then filled in some of the gaps from where the girder plates were joined with green Squadron putty.
One problem I had introduced is that the original bridge was slanted on the outer edges. To account for this I needed to raise up my new bridge to be at a height where it won't be dragging in an odd fashion. To do this I added risers to the center mounting plate.
The 4 holes on this mounting plate are where a piece below the table mates with it, so I drilled out those holes to make sure that piece still fit right.
Mounting the track on the deck is important as it needs to be perfectly centered. To this end I scribed the track center line and the track inner rail lines on the deck in preparation for mounting the track.
After that I drilled holes where the wires to power the track would run. However I also realized at this point I had forgotten to do the ends, so I went ahead and did those as well using scrap from the girder plates.
With that done I glued down the track and soldered on the feed wires. I left rail over hanging on the end of the bridge as I'll cut this down to a perfect size when I'm installing the turntable on the layout.
The deck is now ready for painting! Here's a final shot for this afternoon's modelling activities:
Still To Do:
- Paint the deck
- Build a wooden top deck, covering the ties
- Fix the pit to not suck
- Weather everything


No comments:
Post a Comment